Showing posts with label amigurumi. Show all posts

Sunday, March 3, 2013

Alien Friends

Ethan was playing with ET and the Twi'lek and said they were friends, I thought that was hilarious so I memorialized them in a collage.


I hopefully will have a new pattern up by tomorrow! We are leaving for Disneyland on Tuesday and will be coming back on Saturday. My Etsy shop will be in vacation mode then, but patterns will still be available (with instant download!) on Ravelry and Craftsy. 

My husband is not able to go to Disneyland with us because of work :( so we're going with my parents and my aunt and family. I'm so excited to take the boys! They've been once before in 2011 but Zach was just a baby and I'm not sure if Ethan actually remembers it, or he just remembers from all the times we've watched the videos and looked at the pictures. I'm leaving Craig with like 4 (small) loafs of homemade french bread, some slow cooked pulled pork, and some soup......he'll be set lol. 

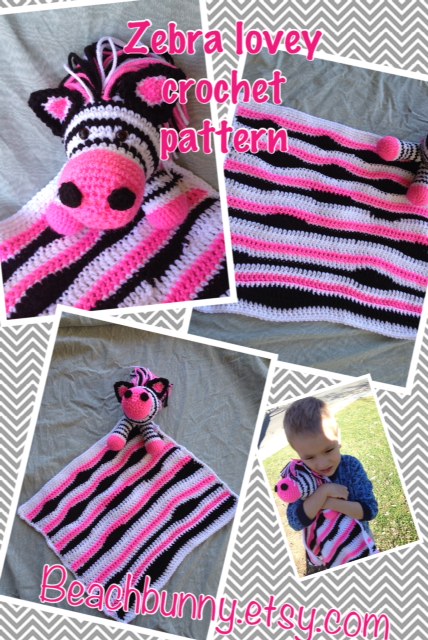
I also put up the pattern for the zebra lovey the other day, I forgot to create a post for it! A friend of ours just had their 3rd baby girl so I thought it would be cute :)
 

Thursday, December 6, 2012

Free Pattern Amigurumi Rum Bottle


This was the first pattern I ever created, it was a 21st birthday gift for my cousin. I used to sell it but it's been free on Ravelry for awhile, but I thought I'd post it here too!

Amigurumi Rum Bottle crochet pattern:
 
Abbreviations:
ch = chain
Sc = single crochet
St = stitch
Dec = decrease
Supplies:
- F Hook
- Any color yarn. You can really be creative on this part, use brown for gold rum, gray
for silver rum, white for coconut rum, yellow for mango rum etc.
- Stuffing
- Safety eyes. Or you can use felt/embroidery.
- Felt for the tag, the bottle cap, and the cheeks.
- Embroidery thread to embroider "Rum" on the tag, for the bow, and the mouth.
- A stitch marker, I use a safety pin and it works perfect.
This pattern is written in the round, with no joining, and working from bottom to top


The body:
-round 1: ch 2, 6 sc in 2nd ch from hook (6)
-round 2: 2 sc in each sc around (12)
-round 3: *sc 1, 2 sc* in each st around (18)
-round 4: *sc 2, 2 sc* in each st around (24)
-round 5: *sc 3, 2 sc* in each st around (30)
-round 6-14 : *sc 30* around (30)
-round 15: *sc 3, dec 1* (24)
-round 16: *sc 2, dec 1* (18)
- You might want to insert the safety eyes and embroider the mouth here, also start to
stuff. You can add weights at the bottom either with pellets, pennies, anything really.
-round 17: *sc 1, dec 1* (12)
-round 18-23 : *sc 12* around (12)
- Finish stuffing.
-row 24: dec all the way around, FO. Dont worry about it looking perfect here, the black
cap will cover it.


Place your black felt piece on top of the bottle neck (where the cap would go) and trace the circle size with a pen/pencil or just cut it out. Then cut out a strip that is long enough to wrap around the top. Glue your circle to the top, then glue your strip all the way around.


Cheeks:
Cut out 2 circles with the pink felt and glue on the cheeks.


Tag:
Take your pink felt and write the word “Rum” on it with a pen. You can write in cursive, block lettering, regular, whatever is easiest for you. Then cut out a rectangle around the lettering to be the front of your tag, then cut another piece the same size for the back. Embroider over your letting using your favorite stitch, I used the back stitch. You don’t have to embroider it if you don’t want to, you could also:


-Spell out rum in glue, then glitter the lettering.
-Paint.
-Glue the lettering on with yarn.
-Buy those foam letter cut-outs and just glue those on.


For the bow: Tie a bow using embroidery thread, leaving 2 long tails that will be glued in between the 2 peices of felt on the tag. Then take your other piece of pink felt, (make sure to glue the ends of the bow in the middle of the 2 pieces of felt!) and just whipstitch it to the first. You can put a few drops of glue to hold them together, it just makes it a little easier.


You're done!

Saturday, December 1, 2012

Twi'lek Star Wars Amigurumi Crochet Pattern

Yay I FINALLY finished the pattern! I will update more about it later:

You can find it at:

Etsy
Ravelry
Craftsy

Sunday, September 5, 2010

Halloween Witch Amigurumi Cupcake

A freshly baked blushing cupcake ready for Halloween! Purple frosting with spooky green swirls and a sweet witch hat!

Cupcake measures a little over 5 inches high from bottom to tip of the hat.


Now I want to make a bunch more like pumpkins and mummies! We'll see what I have the time for lol :)

Saturday, July 3, 2010

Swaps, Amis and Iced Coffee

I haven't been able to post much between needing a new router (we had no internet), having no usb cord to upload pictures.....and taking naps with Ethan instead of posting lol.

We're moving on the 15th! The place is AMAZING! It's huuuuuuge compared to this place, 3 bedrooms (1 downstairs though which sucks), townhouse style, a FULL SIZE dishwasher, it's just awesome. We couldn't be more excited!

I created a prototype for a White Chocolate Dipped Strawberry drizzled with Strawberry Cream that I'll be selling in my Etsy shop, but it's not exactly perfect. I don't like the wave in the white chocolate (I thought I would) and there needs to be more area that's dipped. But here is a picture!


The "One Tiny Sea Creature" Swap from Craftster is also complete, so I can post pictures. I crochet "Willy the Whale" pattern from Shop With Denise. The pattern didn't include any information on yarn size or hook size...so it took me 2 attempts to get the whale down to a smallish size! I normally use a G hook, but it's still bigger then I wanted. I wish I knew what size hook she used to get that cute little whale. I also crafted a starfish out of felt, fishermans netting and embroidery pearls.....and eh it didn't turn out how I wanted. I was kind of rushed and I couldn't get the starfish to glue together all the way...but it's close!


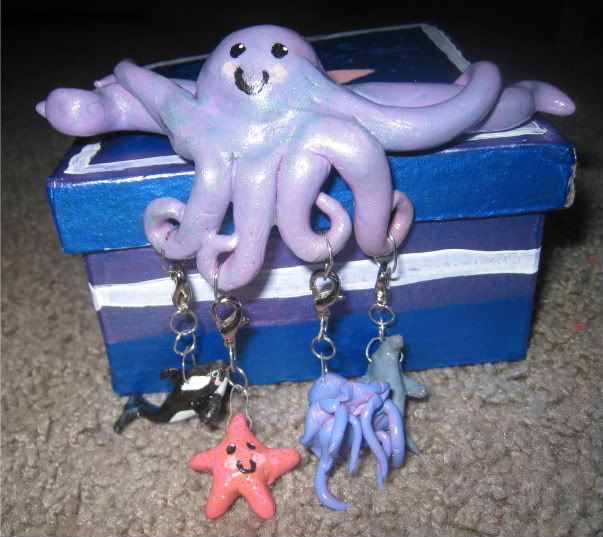
I was super spoiled by my partner, Rippledwater! She painted a box with my username on it, and inside is a sculpy octopus with stitch markers of my favorite sea creatures! It's amazing and I love it :)


This is totally random but here is a great iced coffee recipe:

- 1 tsp instant coffee
- 6oz warm water
- 1 tbs vanilla pudding mix
- 1/2 cup milk
- 1 tsp sugar

Mix the instant coffee with warm water, then add pudding mix and stir. Add the milk and sugar with some ice and drink up! It's so good, no need for me to run to Starbucks now when I need ice coffee!